← All cameras

Panasonic AJ-PX5100G FTP setup

FTPAccessory-assisted camera client2018

AJ-PX5100G can initiate FTP transfer of P2 main-material and proxy clips over wired Ethernet, Wi-Fi via an optional module, or a supported LTE USB modem. Its manual exposes an SSH setting and SSH port but does not name the resulting secure protocol, so secure-mode compatibility remains lab-validation pending.

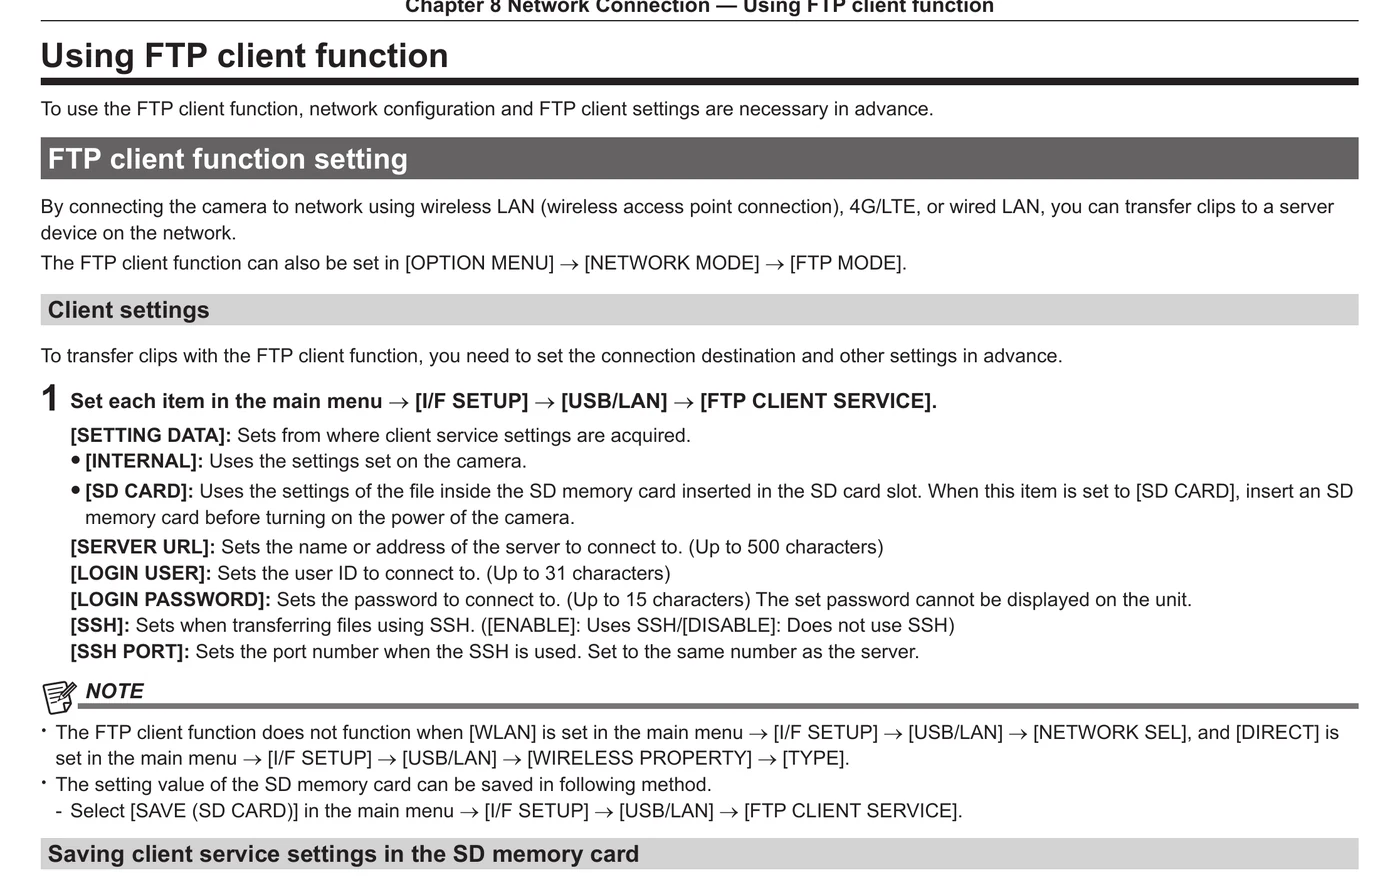
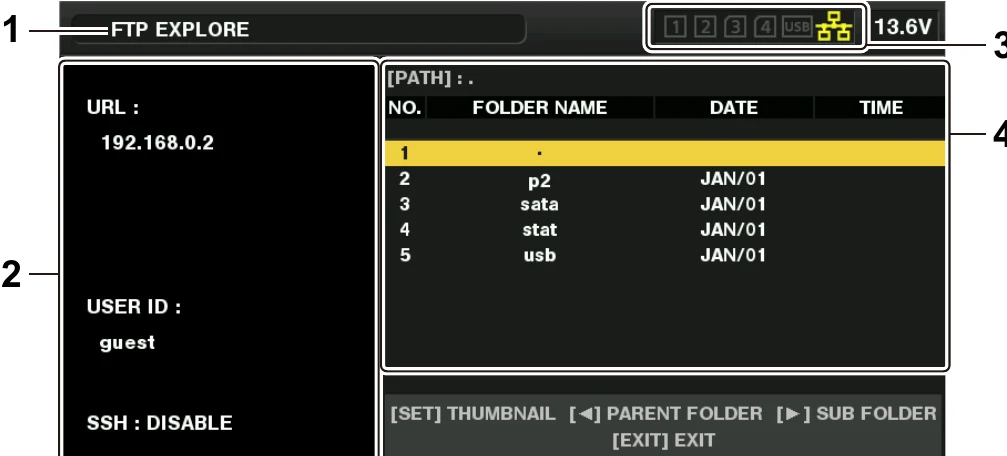
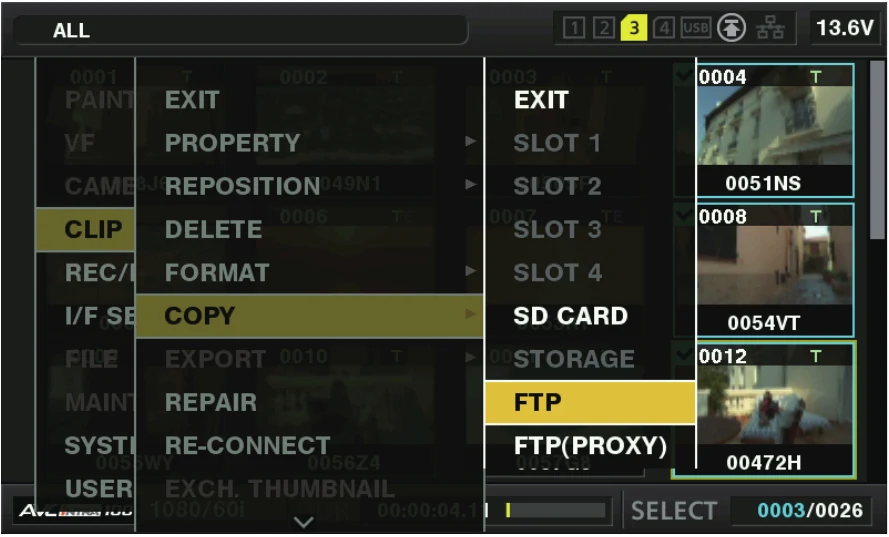
Menu path: Main menu → I/F SETUP → USB/LAN → FTP CLIENT SERVICE > SETTING DATA → MANUAL > SERVER URL / credentials / SSH > Thumbnail → FTP / FTP Explorer > REC DURING UPLOAD / automatic transfer. Protocols: FTP. Sends: P2 main-material clips · proxy clips.

Documented from the manufacturer manual. Sources reviewed .

Transportwired Ethernet + Wi-Fi via optional module + LTE USB modem
PayloadP2 main-material clips · proxy clips
Triggersmanual selected-clip transfer and automatic upload after recording

Before you touch the menu

What to gather

  1. 01Establish a supported route: wired Ethernet; Wi-Fi via optional module; LTE USB modem.
  2. 02Have the required hardware or provisioning ready: AJ-WM50 wireless module for Wi-Fi; supported LTE modem for mobile broadband.
  3. 03Prepare a reachable FTP server, login, writable directory, and enough server capacity for P2 main-material and proxy clips. Treat the documented SSH mode as a separate compatibility test, not verified SFTP.

Connection fields

SERVER URL

The server name or address; append only the folder syntax documented by Panasonic for this model.

Defines both the destination host and, where supported, its login-relative folder.

LOGIN USER

The camera/event-specific account name.

Authenticates the FTP client.

LOGIN PASSWORD

The password issued with that account.

Completes server authentication.

SSH

Leave disabled for the verified FTP path. Enable only against an isolated test listener while validating the camera's undocumented secure-protocol handshake.

The manual names SSH but not SFTP; a captured successful handshake is required before publishing a secure-protocol claim.

SSH PORT

The exact port of the isolated compatibility listener used for an SSH-mode test.

Keeps the unverified secure mode separate from the production FTP and SFTP listeners.

REC DURING UPLOAD / upload target

Choose proxy or recorded/main clip behavior supported by the current recording format.

Controls what is queued after recording.

The menu, step by step

What moves, and what does not

Transfer modes

  • Documented operation: manual selected-clip transfer and automatic upload after recording.
  • Begin with a manually selected short clip; enable automatic/record-during-upload only after end-to-end verification.

Media behavior

  • Documented payload classes: P2 main-material clips, proxy clips.
  • Main material and proxy are separate transfer targets where documented; confirm the active recording format creates the chosen payload.
  • Do not remove or format the recording card while an upload is pending or active.

Limits and warnings

  • Required equipment/provisioning: AJ-WM50 wireless module for Wi-Fi; supported LTE modem for mobile broadband.
  • Network and transfer availability depends on current camera state and the active recording format.
  • Test large files and the selected recording format before production; older P2 manuals document format- or size-specific transfer restrictions.
  • The manual exposes SSH settings but never identifies the secure transfer protocol as SFTP. Keep secure-mode claims disabled until a real-camera handshake test passes.

Prove it on your body

Run this checklist on the exact body, firmware, network, and media format you will use on assignment.

The manual exposes SSH enablement and an SSH port but does not name SFTP; secure-mode compatibility is lab-validation pending Physical Camera to Anywhere interoperability is not yet lab-verified.

  1. 01Confirm the camera has an IP address and can resolve/reach the server.
  2. 02Transfer one short eligible clip and confirm it appears in the assigned folder.
  3. 03Open the received file and compare size/duration with the source.
  4. 04Confirm whether the received object is main material or proxy.
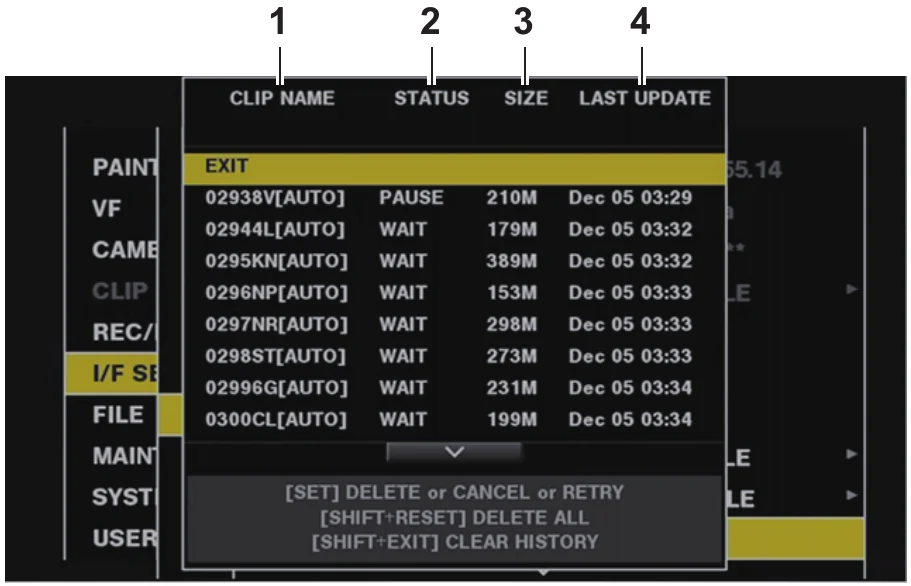
  5. 05If automatic upload is enabled, record another short clip and verify the queue and completion state without removing the card.

If it will not send

01FTP CLIENT SERVICE or UPLOAD is unavailable.

Verify firmware, network device selection, adapter recognition, recording/playback state, and any profile or license prerequisite.

02The server cannot be reached.

Confirm DHCP/static address, gateway, DNS, server URL, port, route, and venue firewall/NAT behavior.

03Authentication succeeds but copying fails.

Check destination syntax, write permission, free space, card state, file-size limits, and whether the format is eligible.

04The optional SSH mode will not negotiate or its protocol is unclear.

Return to verified FTP for production. Use a packet/handshake capture against an isolated listener to identify the protocol and algorithms before enabling a secure-mode compatibility badge.

05Automatic upload pauses or never queues.

Check upload enablement, profile state, recording format, card access load, shot-mark/proxy filters, and incompatible streaming/NDI modes.

Sources

The local archive keeps this research reproducible if an official link changes. It is not redistributed through this site.

  1. 01

    Official model or firmware evidence

    FTP client function setting; FTP server setting (SSH); Transferring clips automatically

    Open manufacturer source ↗
  2. 02

    Official manufacturer PDF

    FTP client function setting; FTP server setting (SSH); Transferring clips automatically

    Open manufacturer source ↗

archived-official-pdf · retrieved 2026-08-26T04:40:28Z · 263 pages

Have this camera? Help us test the path.

Join for free