← All cameras

Panasonic AJ-CX4000G FTP setup

FTP · SFTPVendor-profile camera client2020

AJ-CX4000G can initiate FTP, SFTP transfer of P2 main-material clips, P2 proxy clips over wireless LAN; wired LAN; USB tethering. The documented route is provisioned through a vendor cloud profile; it is not equivalent to unrestricted direct endpoint entry on the camera.

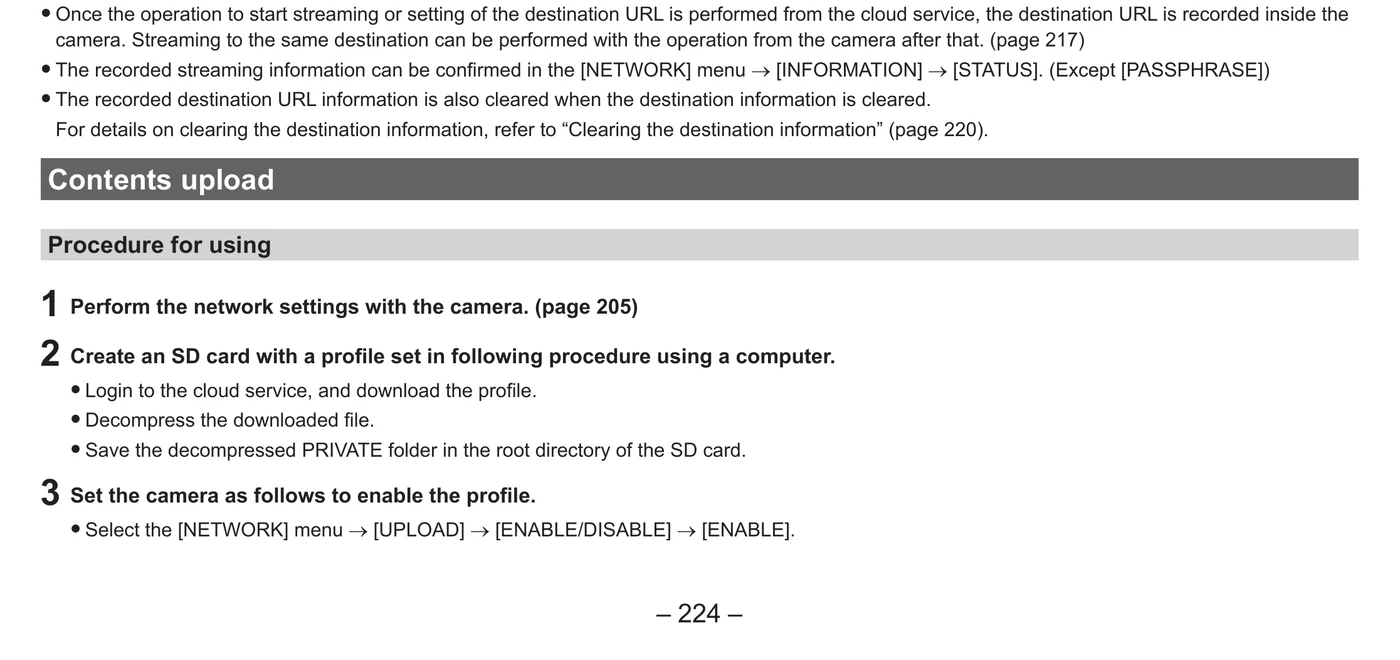
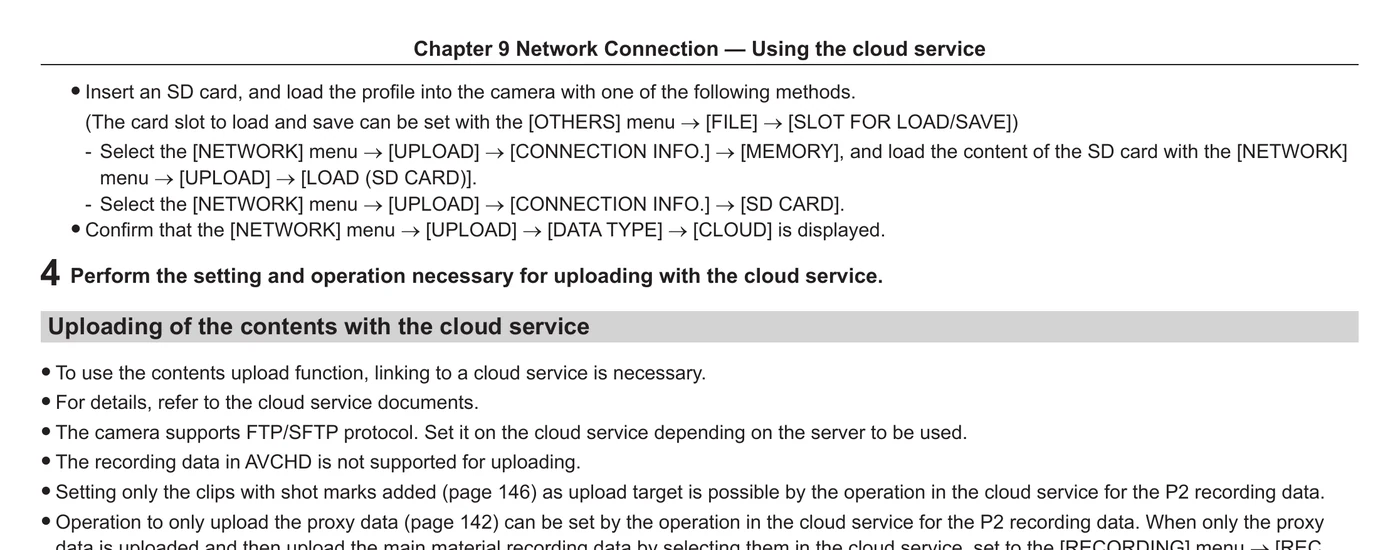
Menu path: Configure the camera network > NETWORK → UPLOAD → ENABLE/DISABLE → ENABLE > NETWORK → UPLOAD → CONNECTION INFO. > NETWORK → UPLOAD → DATA TYPE → CLOUD > Apply upload policy in the linked cloud service. Protocols: FTP · SFTP. Sends: P2 main-material clips · P2 proxy clips.

Documented from the manufacturer manual. Sources reviewed .

Transportwireless LAN + wired LAN + USB tethering
PayloadP2 main-material clips · P2 proxy clips
Triggersupload rules are configured through the linked cloud service; shot-mark and proxy-only policies are supported

Before you touch the menu

What to gather

  1. 01Establish a supported route: wireless LAN; wired LAN; USB tethering.
  2. 02Have the required hardware or provisioning ready: Panasonic cloud-service account/profile provisioned to SD card; network adapter or phone for the selected connection route.
  3. 03Create the linked cloud-service profile on a computer, decompress it, and place its PRIVATE folder at the root of the SD card as Panasonic specifies.
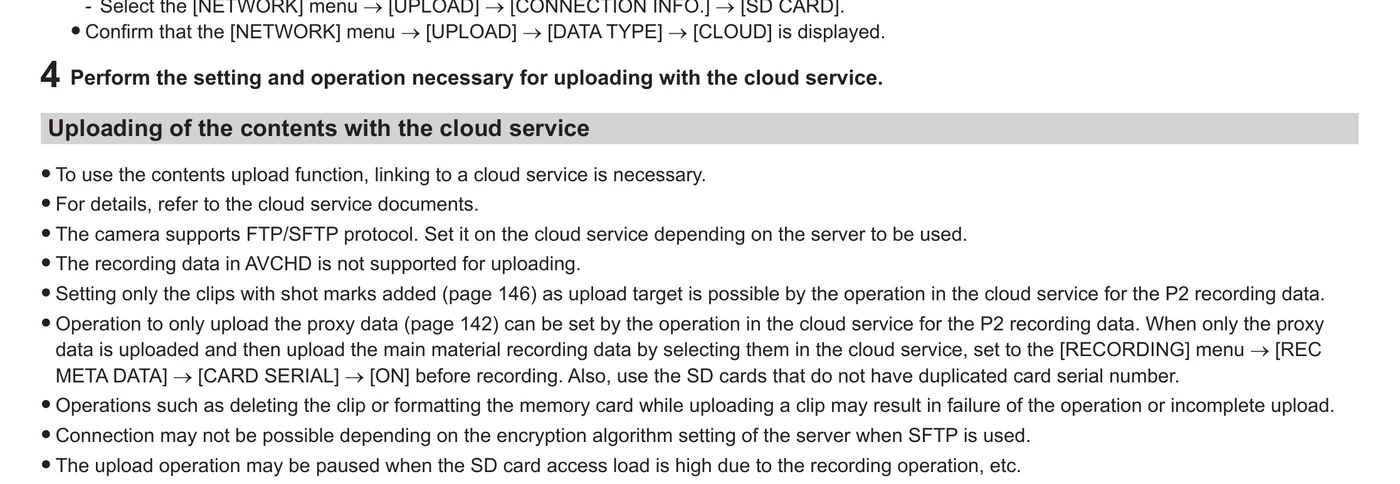
  4. 04Firmware qualification: AVCHD recordings are not uploadable.
  5. 05Firmware qualification: SFTP server cipher compatibility can prevent connection.

Connection fields

Profile package

The exact PRIVATE folder downloaded from the linked cloud service, placed at the SD-card root.

These models do not expose arbitrary destination entry as a normal direct camera form; the profile provisions it.

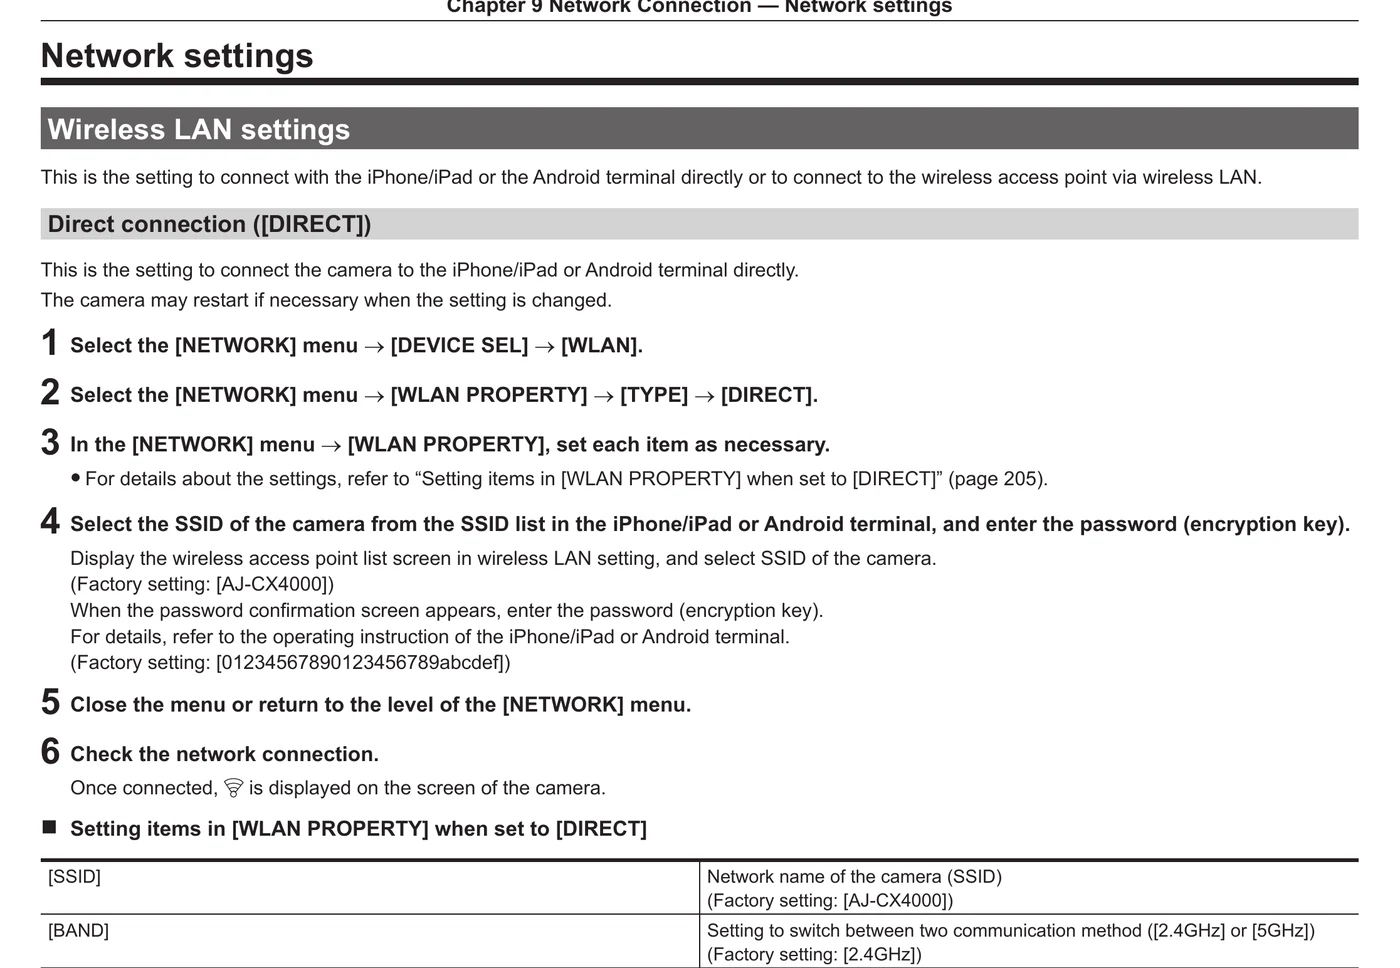
Connection Info.

MEMORY after LOAD (SD CARD), or SD CARD for direct use.

Selects where the camera reads the provisioned connection data.

Protocol in cloud profile

Select a documented protocol: FTP, SFTP.

The provisioning service must emit settings compatible with the destination server.

Server / credentials / directory

Enter these in the linked cloud service, not by guessing values in the camera.

The generated profile carries the destination configuration to the camera.

Upload policy

Choose all eligible clips, shot-marked clips, or proxy-only P2 behavior as required.

Controls bandwidth and which media leaves the camera.

The menu, step by step

What moves, and what does not

Transfer modes

  • Documented operation: upload rules are configured through the linked cloud service; shot-mark and proxy-only policies are supported.
  • Begin with a manually selected short clip; enable automatic/record-during-upload only after end-to-end verification.
  • Shot-mark-only and proxy-only rules are set in the linked cloud service rather than solely on the camera.

Media behavior

  • Documented payload classes: P2 main-material clips, P2 proxy clips.
  • Main material and proxy are separate transfer targets where documented; confirm the active recording format creates the chosen payload.
  • Do not remove or format the recording card while an upload is pending or active.

Limits and warnings

  • Required equipment/provisioning: Panasonic cloud-service account/profile provisioned to SD card; network adapter or phone for the selected connection route.
  • AVCHD recordings are not uploadable
  • SFTP server cipher compatibility can prevent connection
  • This is a vendor-profile-provisioned path, not direct arbitrary endpoint entry on the camera; Camera to Anywhere integration requires a compatible profile-generation path or a different ingest route.

Prove it on your body

Run this checklist on the exact body, firmware, network, and media format you will use on assignment.

AVCHD recordings are not uploadable SFTP server cipher compatibility can prevent connection The manufacturer provisions the server profile; arbitrary on-camera endpoint entry is not documented. Physical Camera to Anywhere interoperability is not yet lab-verified.

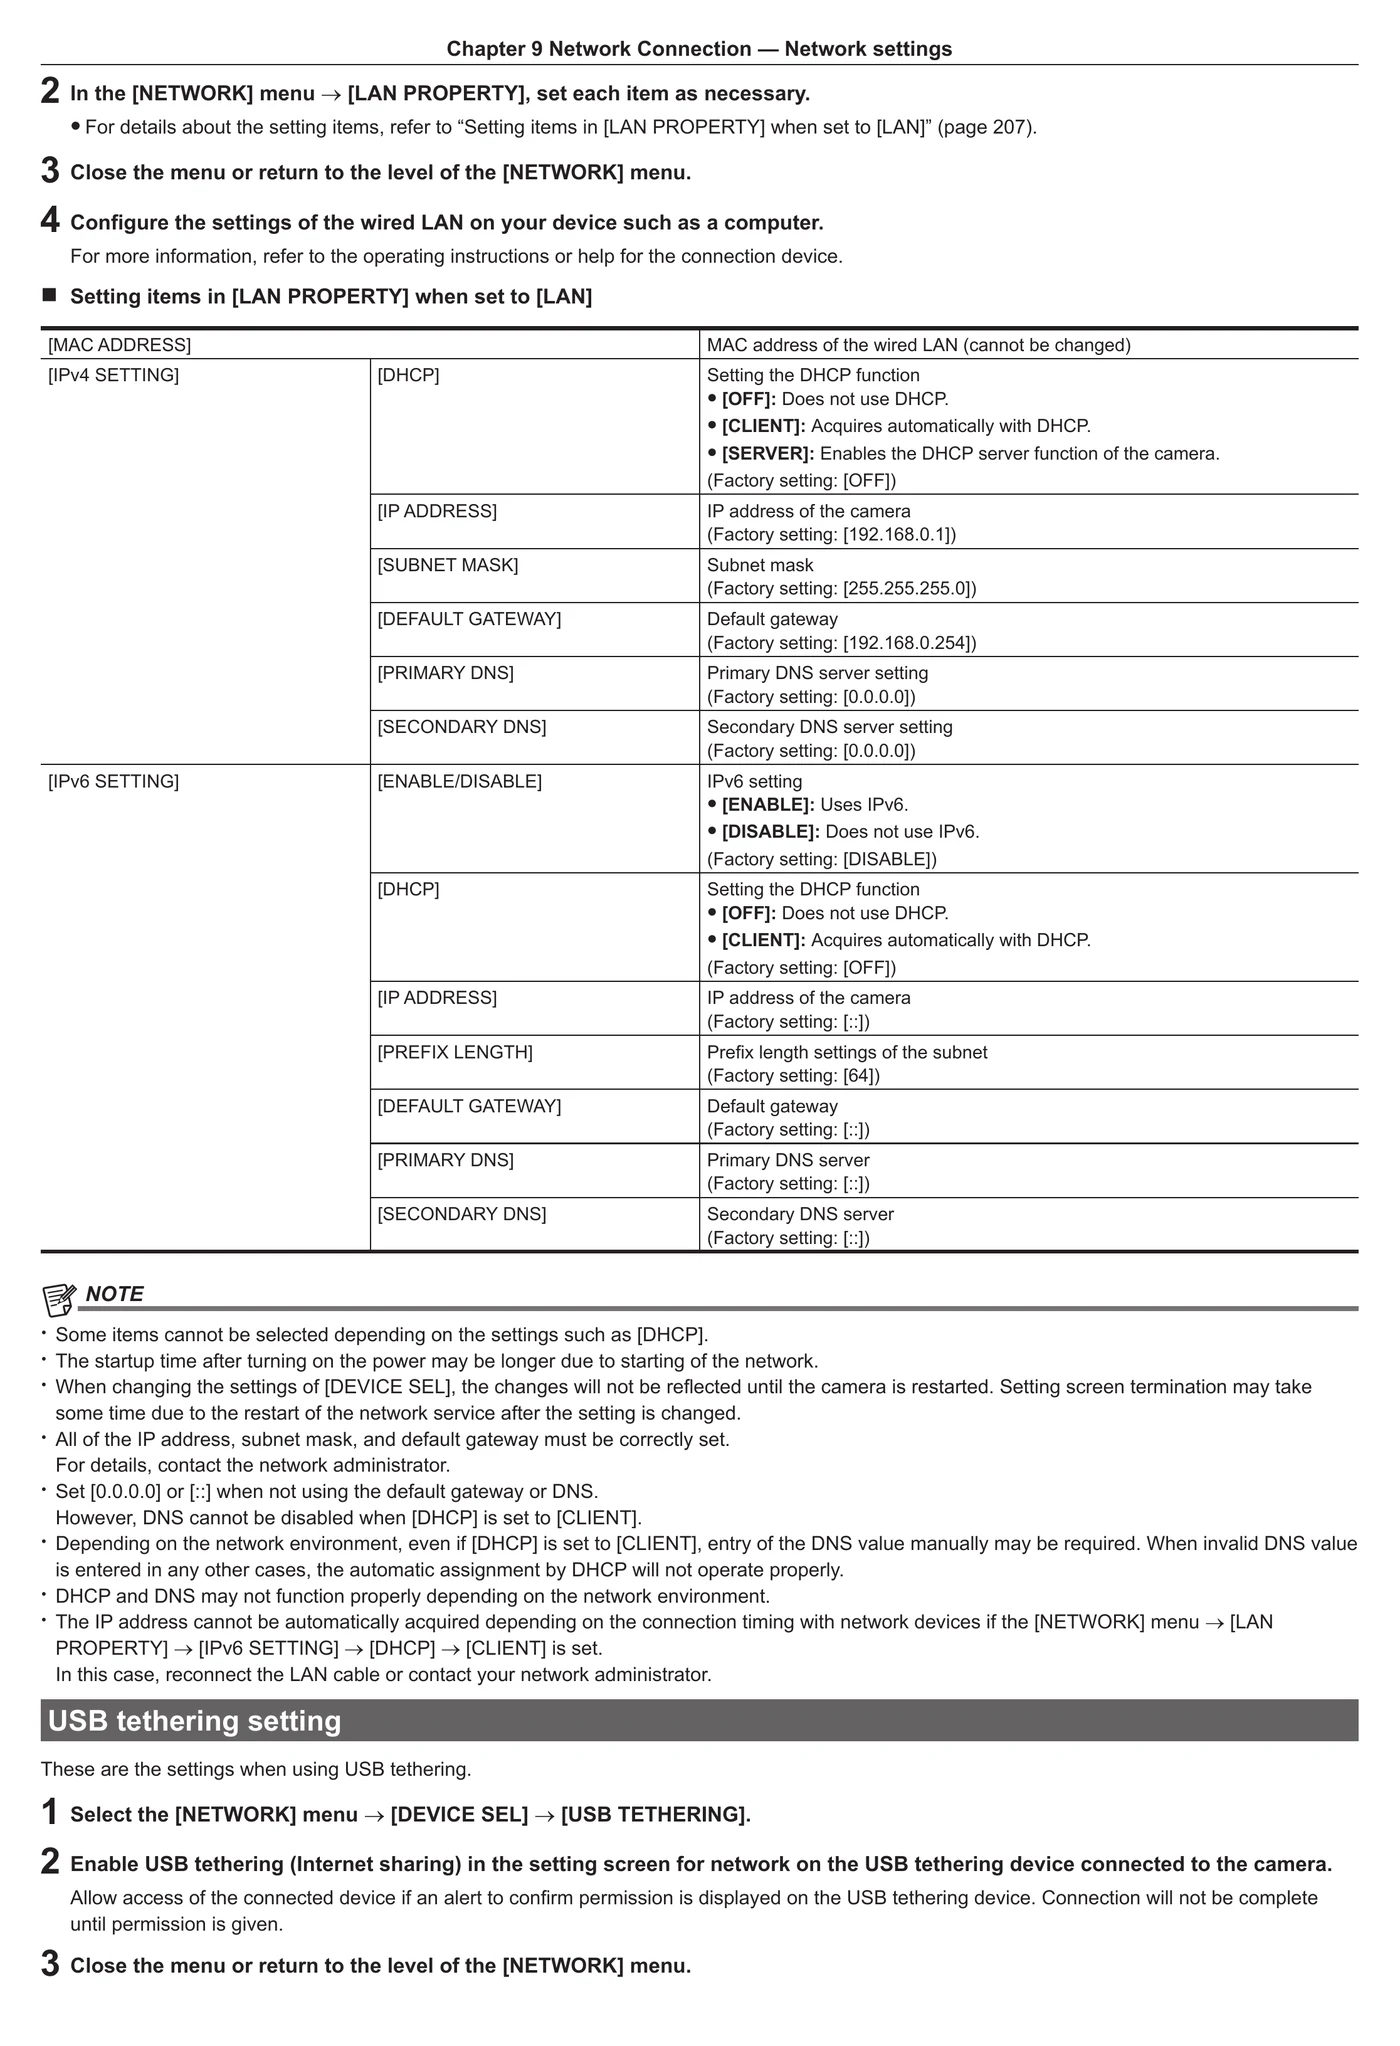
  1. 01Confirm the camera has an IP address and can resolve/reach the server.
  2. 02Transfer one short eligible clip and confirm it appears in the assigned folder.
  3. 03Open the received file and compare size/duration with the source.
  4. 04Confirm whether the received object is main material or proxy.
  5. 05If automatic upload is enabled, record another short clip and verify the queue and completion state without removing the card.

If it will not send

01FTP CLIENT SERVICE or UPLOAD is unavailable.

Verify firmware, network device selection, adapter recognition, recording/playback state, and any profile or license prerequisite.

02The server cannot be reached.

Confirm DHCP/static address, gateway, DNS, server URL, port, route, and venue firewall/NAT behavior.

03Authentication succeeds but copying fails.

Check destination syntax, write permission, free space, card state, file-size limits, and whether the format is eligible.

04SFTP/SSH will not negotiate.

Match the SSH port and server encryption algorithms to those supported by the camera/manual revision.

05Automatic upload pauses or never queues.

Check upload enablement, profile state, recording format, card access load, shot-mark/proxy filters, and incompatible streaming/NDI modes.

Sources

The local archive keeps this research reproducible if an official link changes. It is not redistributed through this site.

  1. 01

    Official model or firmware evidence

    Contents upload; Uploading of the contents with the cloud service

    Open manufacturer source ↗
  2. 02

    Official manufacturer PDF

    Contents upload; Uploading of the contents with the cloud service

    Open manufacturer source ↗

archived-official-pdf · retrieved 2026-08-26T04:40:28Z · 245 pages

Have this camera? Help us test the path.

Join for free